HOURNEXA USER GUIDE · 03 / 09
Make the week add up
Record a day in seconds, check automatic entries and protect a finished week from accidental changes.
Enter and save hours
- Open Weekly hours and choose the week. Use the arrows or This week to navigate.
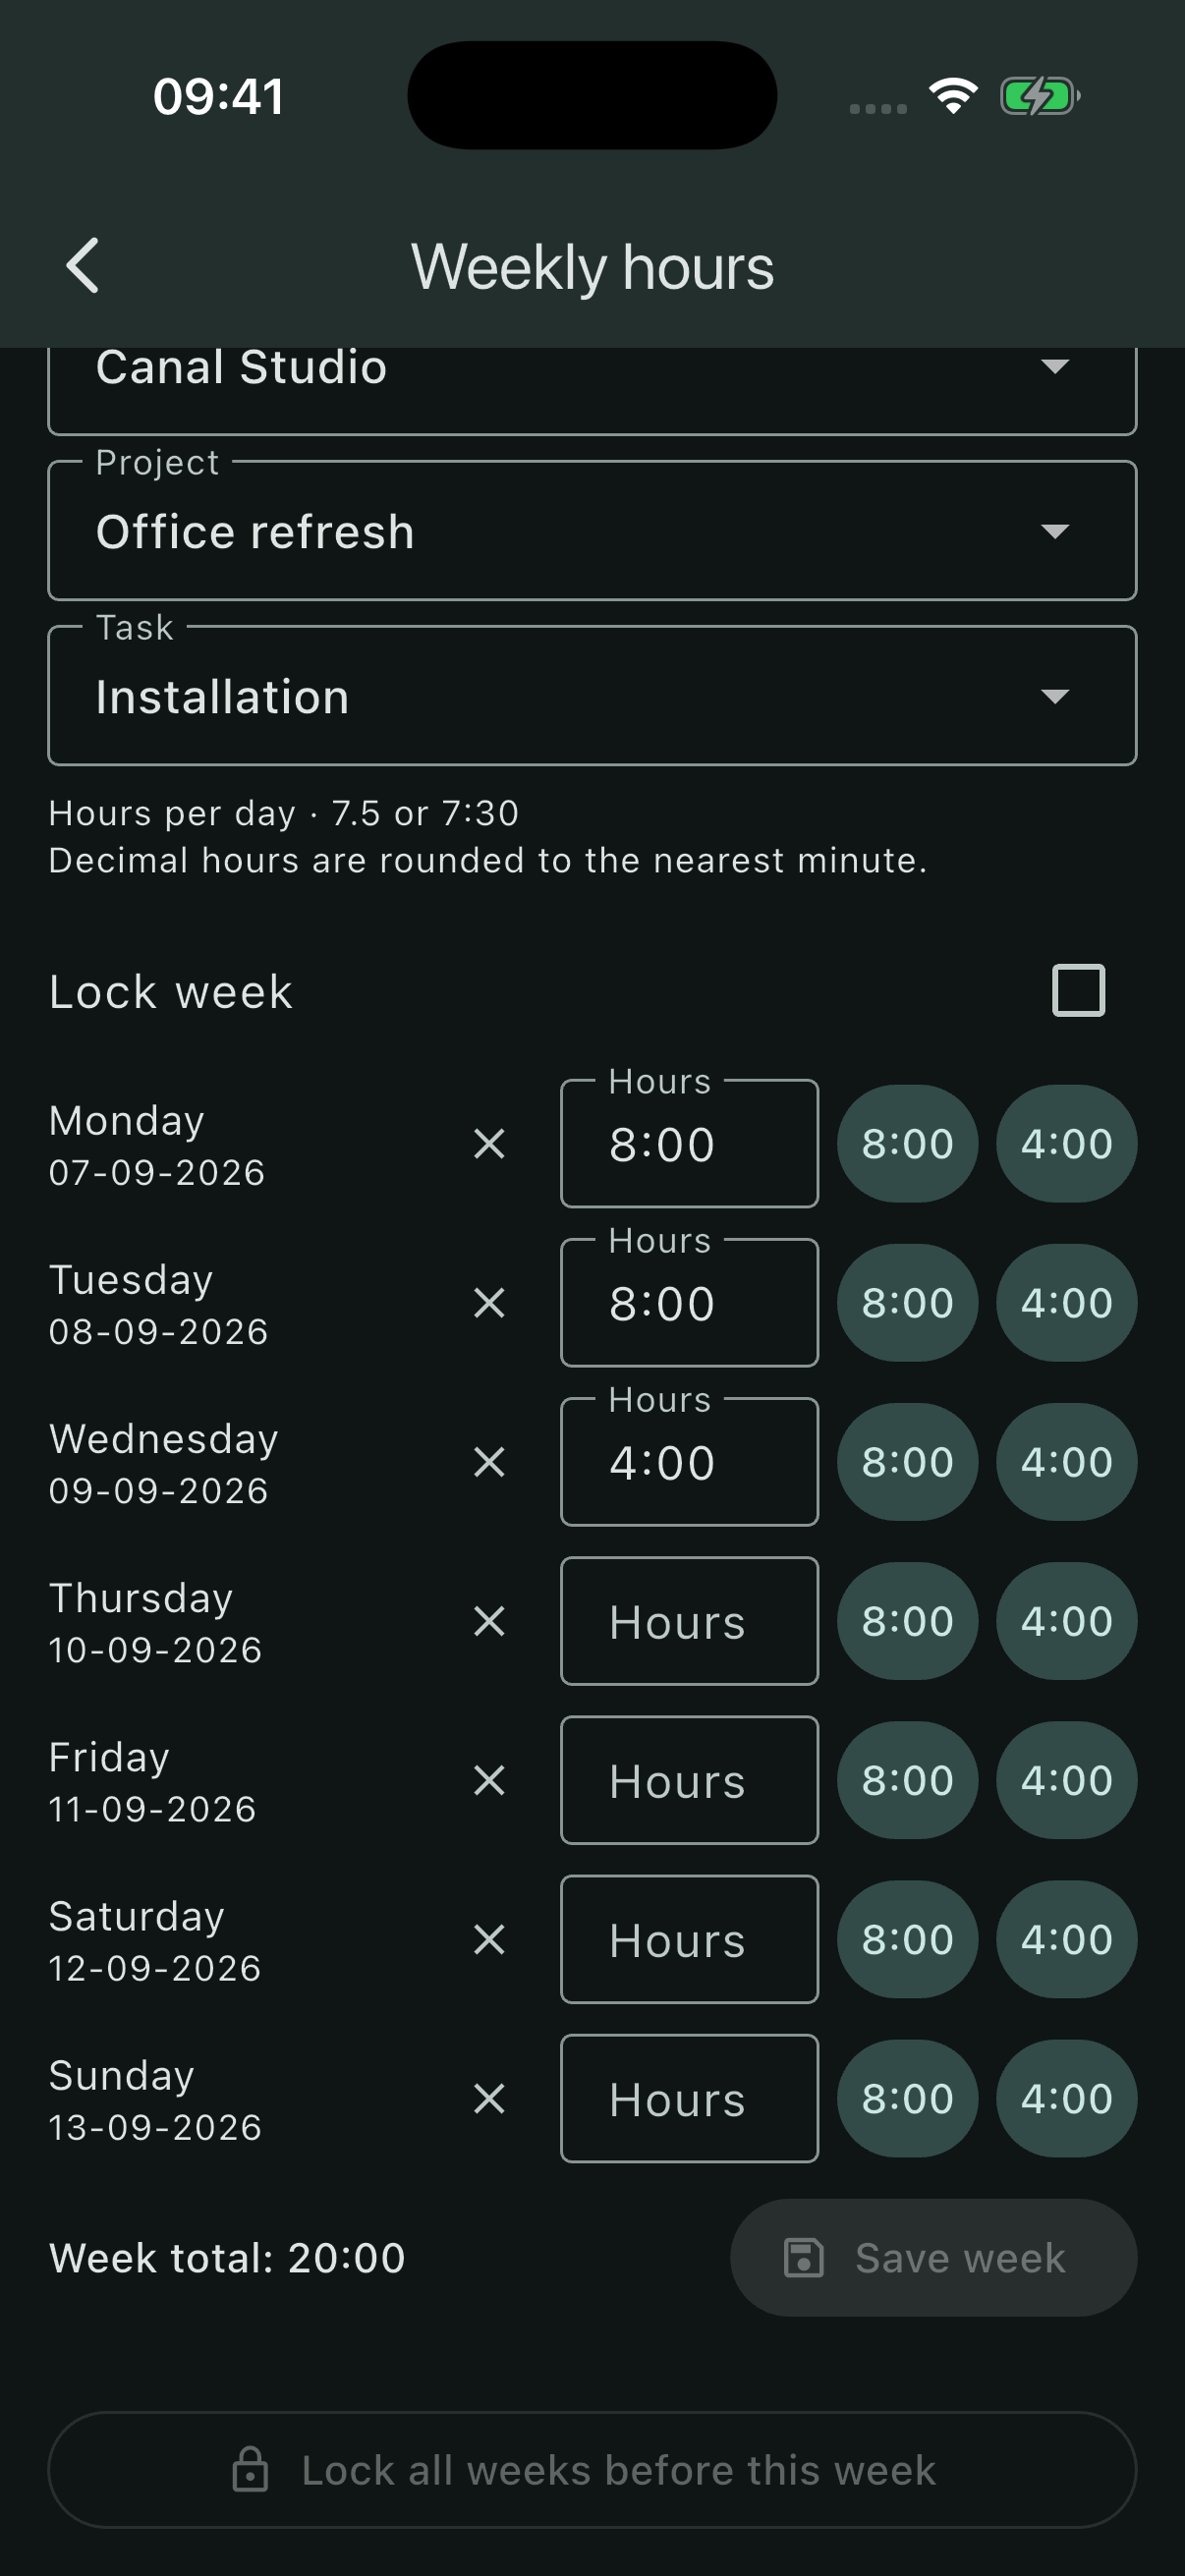
- Select the Client, Project and Task. These choices determine where the hours are saved.
- Type hours into a day, or use a preset button. A preset replaces that day’s current input.
- Check Week total and select Save week. Scroll down if the button is below the visible days.
Installation has 8 hours on Monday, 8 on Tuesday and 4 on Wednesday: 20:00 for the week.
Read hours correctly
| Input | Meaning |
|---|---|
7:30 | 7 hours and 30 minutes. |
7.5 | 7½ hours, also 7 hours and 30 minutes. |
7.30 | 7.3 decimal hours: 7 hours and 18 minutes. |
0:15 | 15 minutes, not 0.15 hours. |
Decimal input is rounded to the nearest whole minute. The rounding interval for automatic tracking is a separate setting.
Review automatic hours
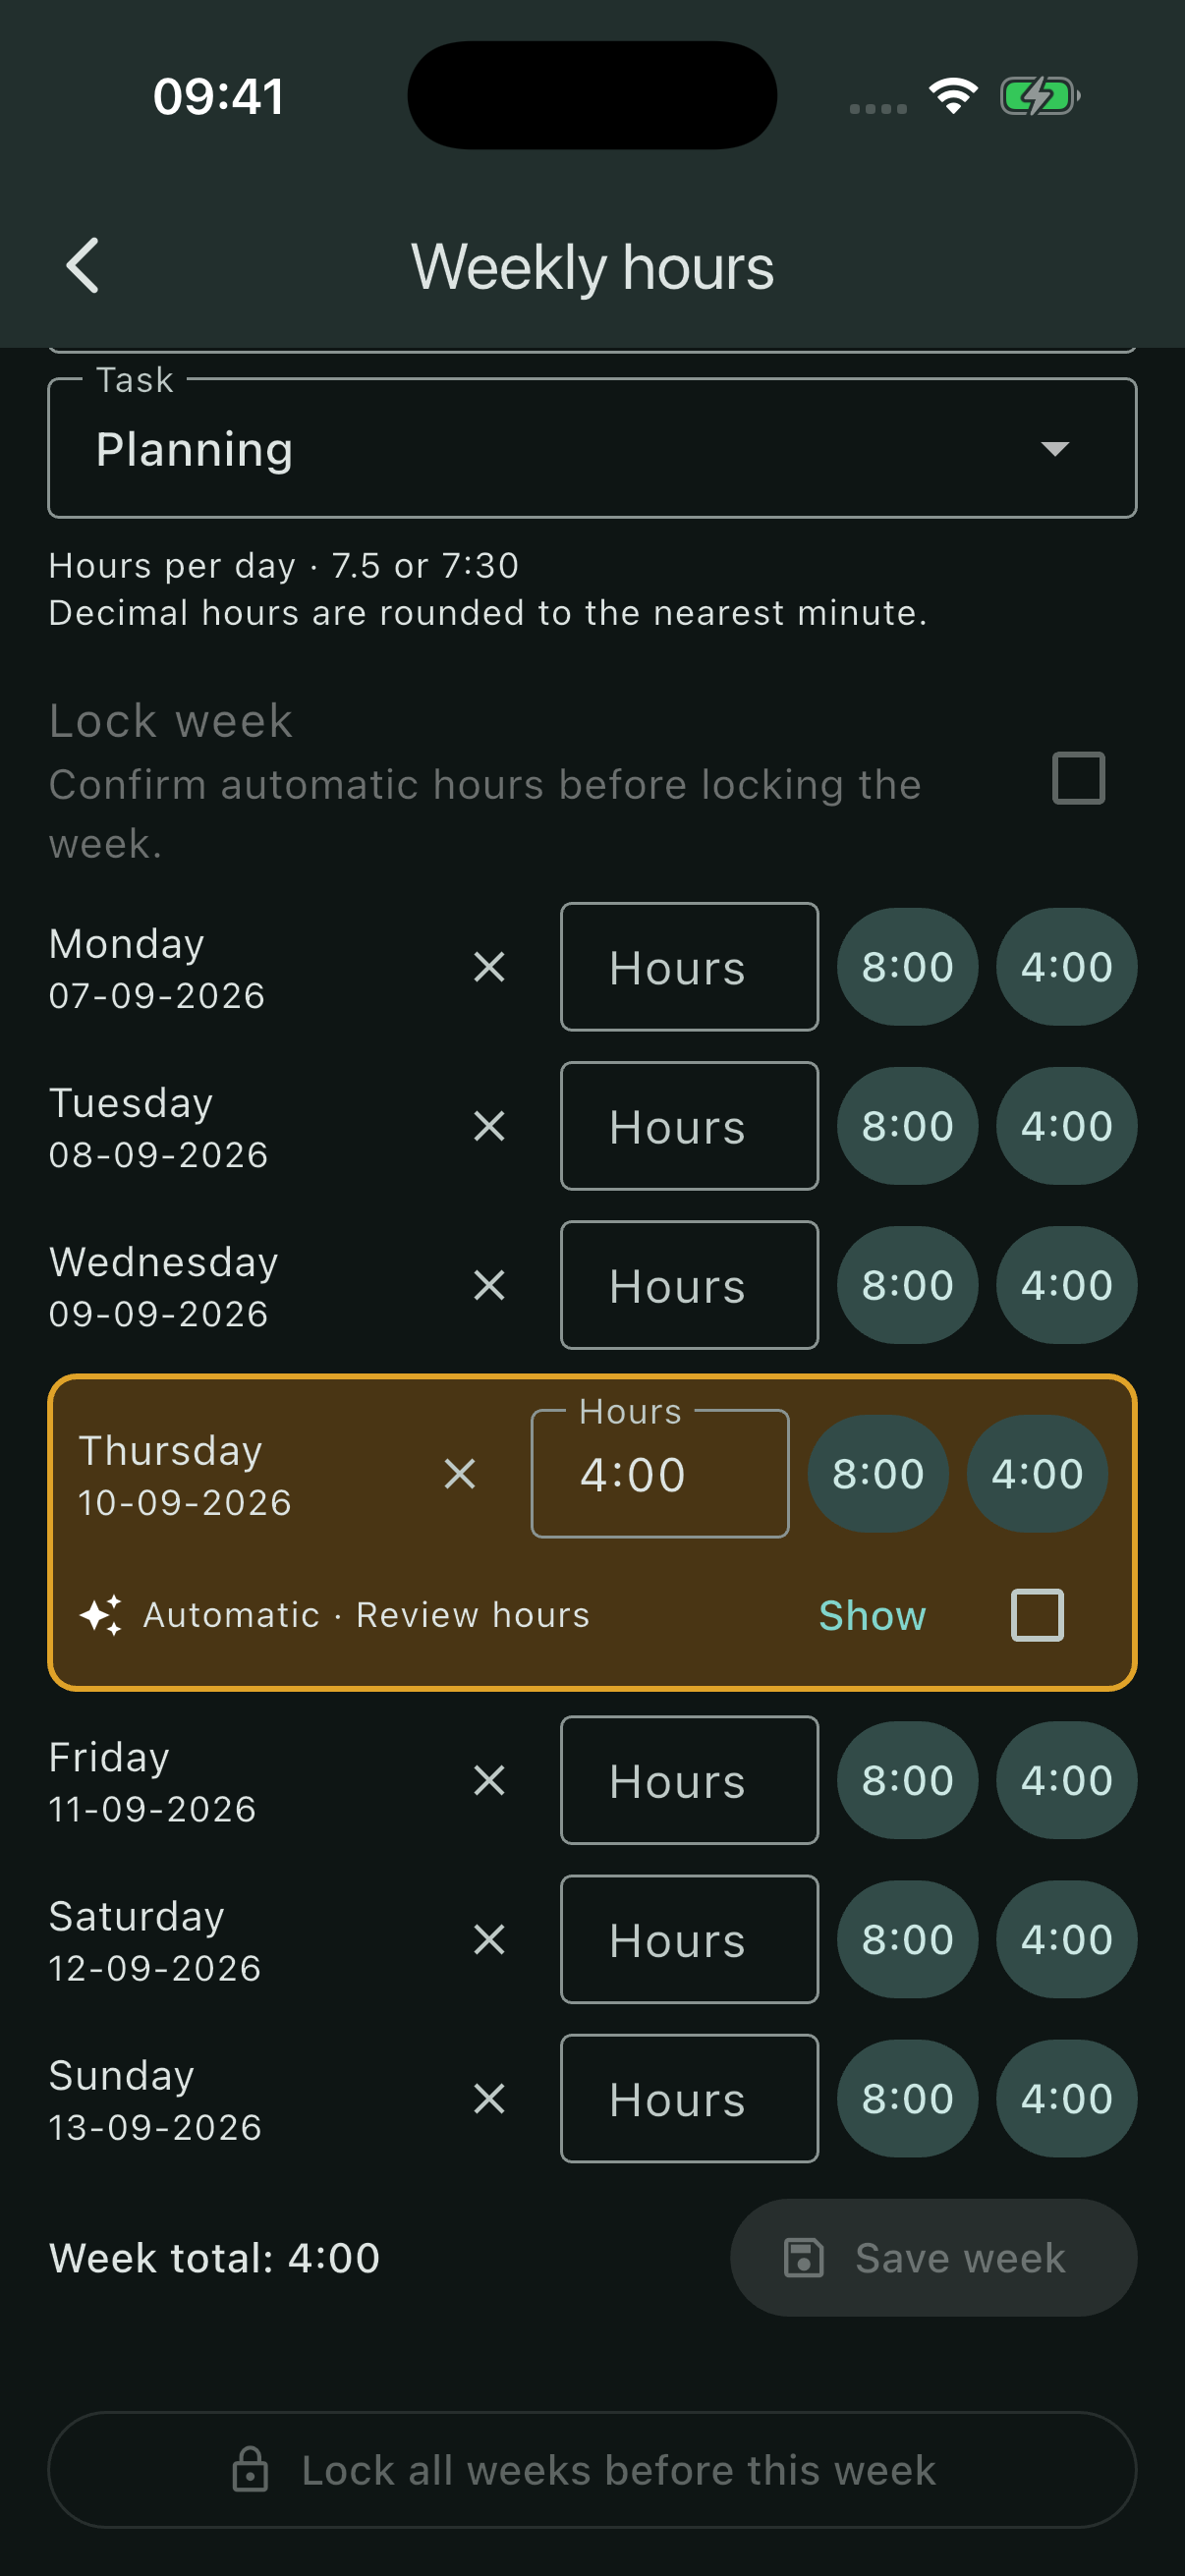
Completed automatic registrations can create highlighted days marked Automatic · Review hours. Open Show to see the underlying start times, end times and duration before rounding.
- Compare the recorded time with the work you actually did.
- Correct the daily hours if necessary and save your changes.
- Confirm the hours with the review checkbox. Confirm automatic entries before locking the week.
The home screen can show hours waiting for review. Open that list to work through entries from several tasks.
Lock a finished week
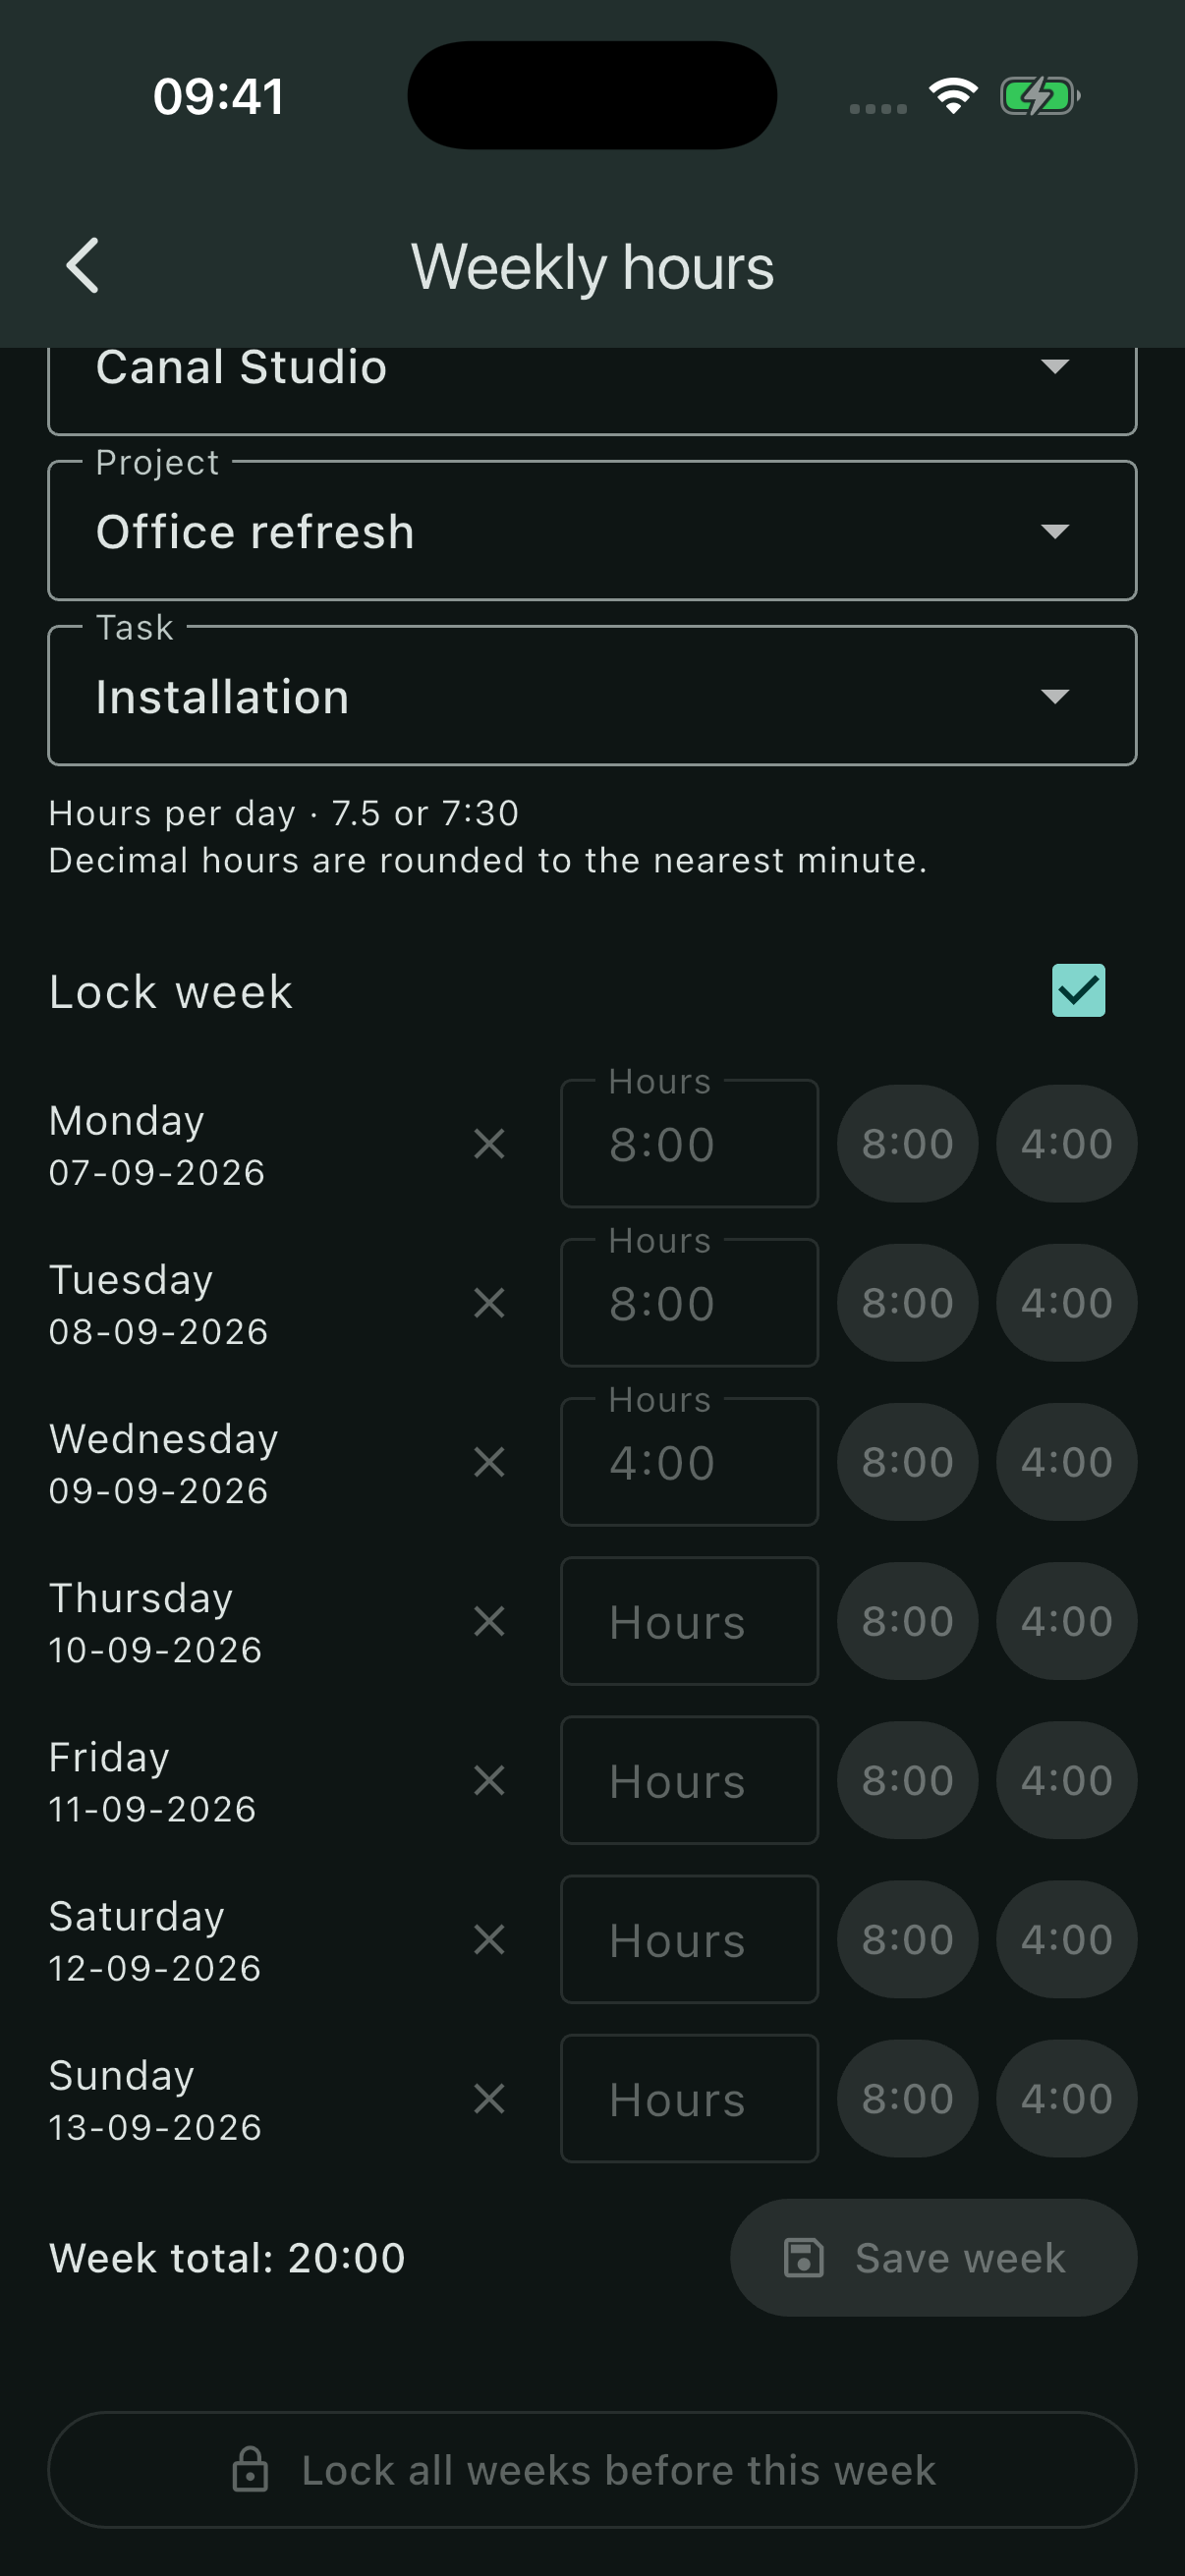
When the entries are saved and automatic hours are confirmed, enable Lock week. The day fields become read-only. Empty days in that week are protected too.
To make a correction, turn off Lock week and confirm the unlock. Edit, save and lock again when ready.
Lock all weeks before this week protects earlier weeks for the selected task, starting with its first recorded week. It includes empty days in that period.
Bring in hours from a spreadsheet
Open a task, scroll down and select Import CSV hours. The chosen task receives all the imported hours; the file does not create clients, projects or tasks.
- Choose a CSV or TSV file with a header row.
- Select the Date column and Hours column. The hours column must contain durations, not a number of minutes.
- Choose the numeric date order if dates are ambiguous, then select Preview import.
- Check the days, totals and overwrite choices before importing.
Date,Hours
2026-09-07,8:00
2026-09-08,7:30
2026-09-08,0:30
The two rows for 8 September are combined into 8 hours. Existing days are skipped by default. Overwrite existing hours replaces unlocked daily totals; locked days have their own explicit overwrite option. Read the import summary to see what was added, replaced or skipped.