HOURNEXA USER GUIDE · 05 / 09
Turn recorded work into a report
Use a monthly timesheet for a client, a flexible hours report for analysis, or a mileage claim based on recorded days.
Choose the right document
| Open under Reports & timesheets | Use it for |
|---|---|
| Timesheet | A monthly PDF for a selected client, project and tasks, with space for a name and signature. |
| Reporting | An overview or daily hours report across selected clients, projects and tasks. Export PDF or CSV. |
| Mileage claim | Driving distances and a claim amount for selected days with recorded hours. |
Reports use the hours you have recorded. Check the client, tasks and period before generating a document.
Create a monthly timesheet
- Open Reports & timesheets → Timesheet.
- Choose the month. The screen initially opens the previous month; select This month for the current one.
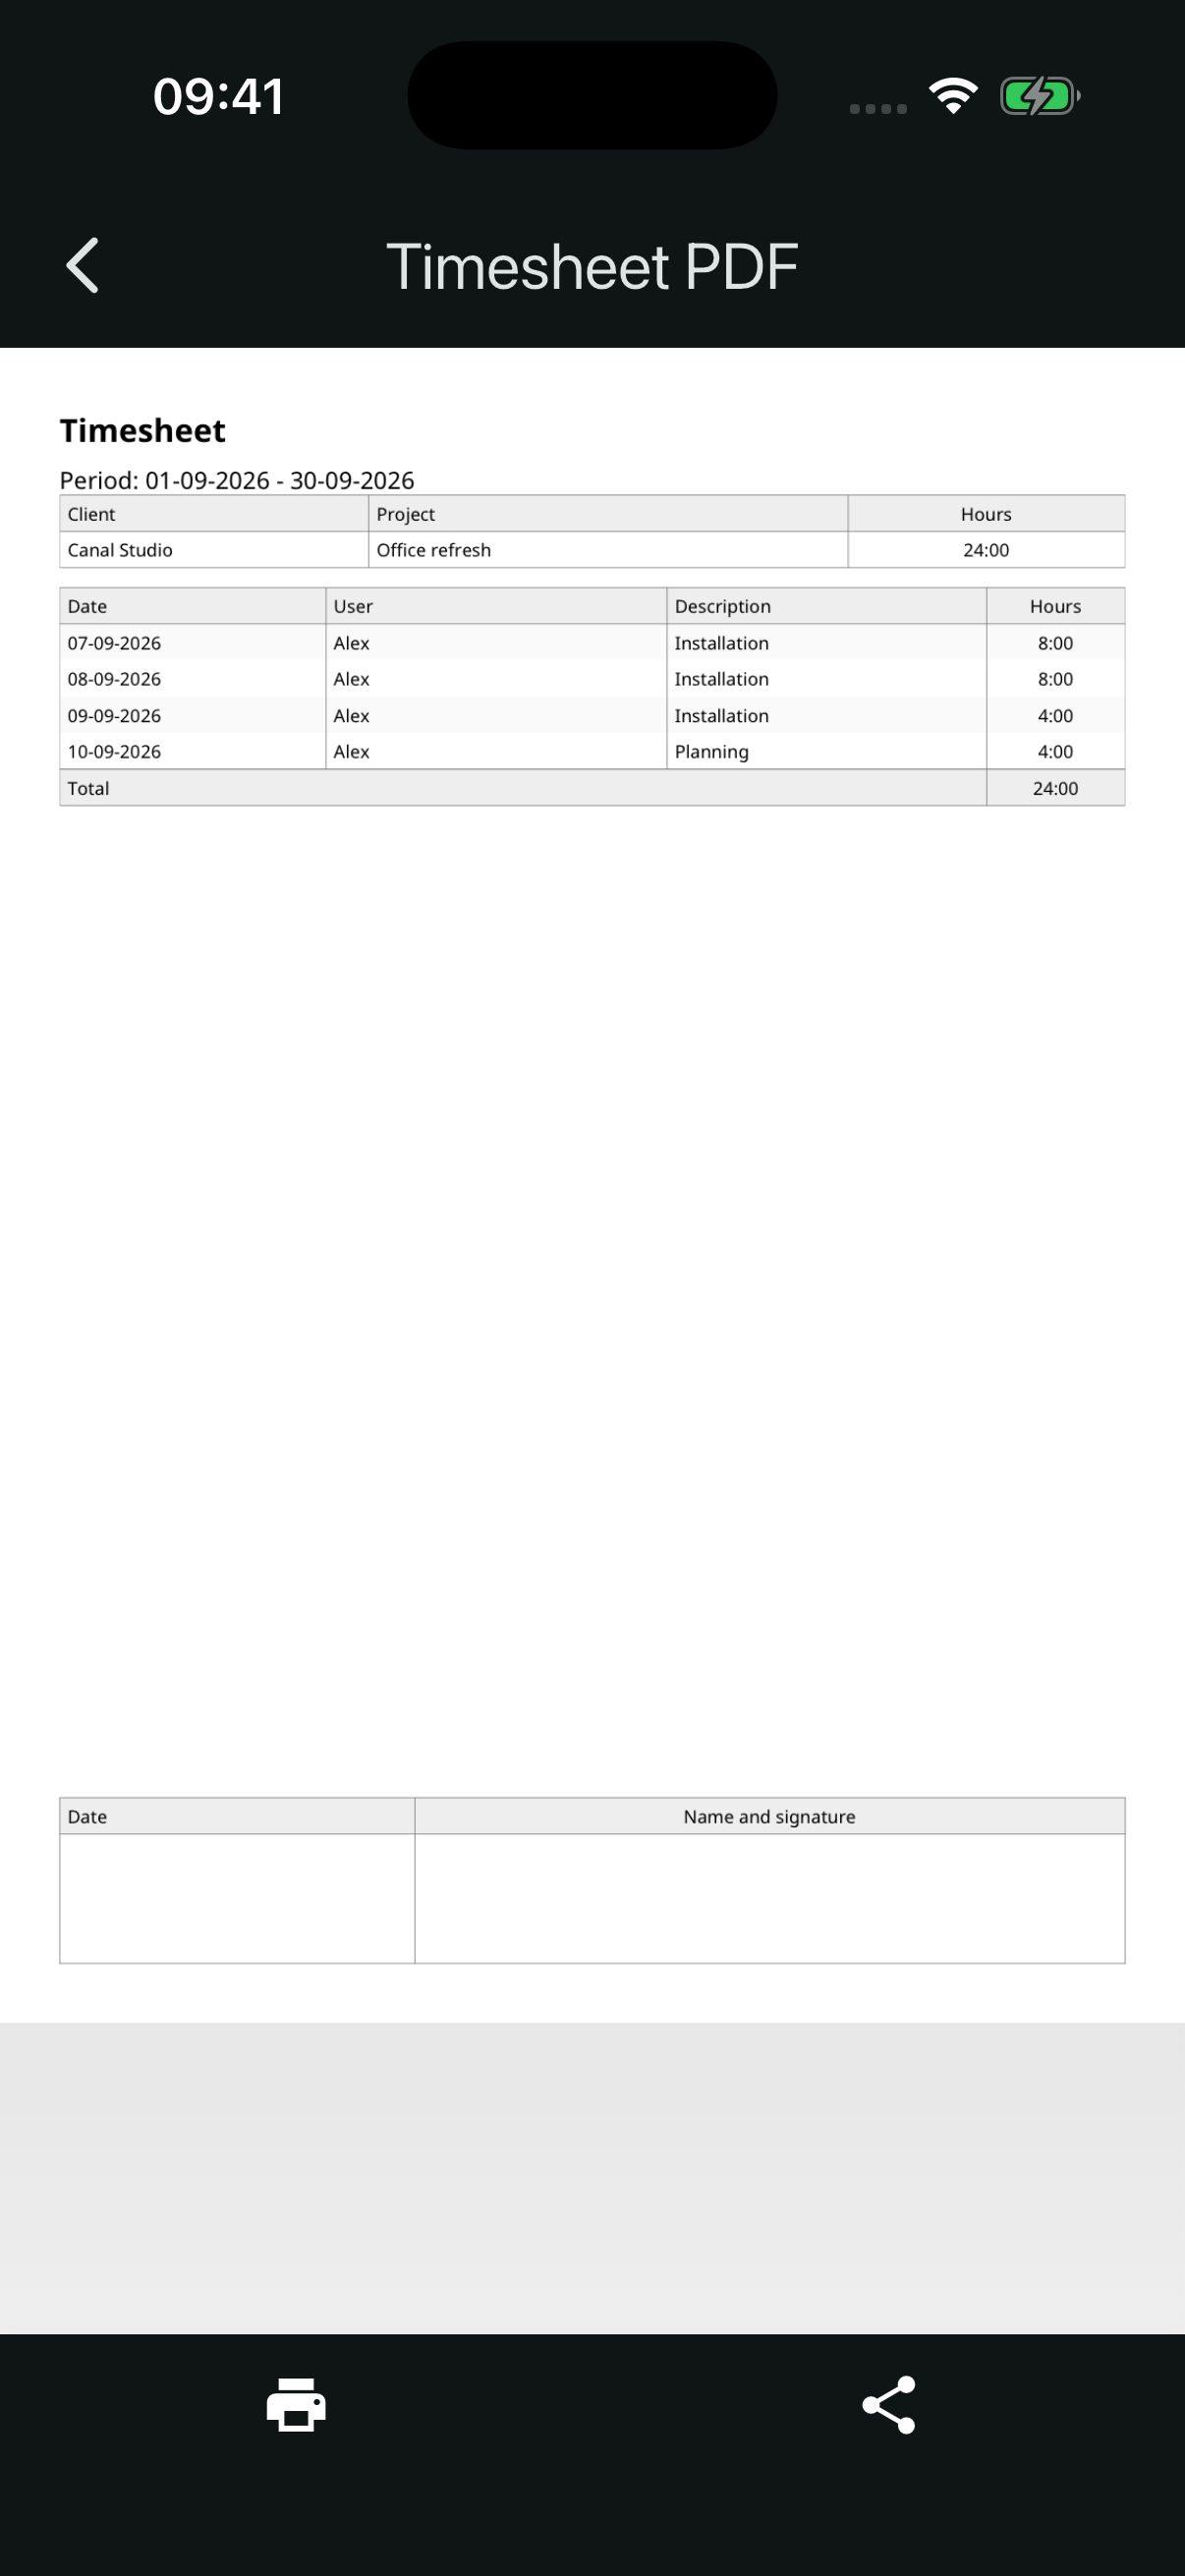
- Choose the client, project and the tasks to include. Check the task selection if a project has several tasks.
- Select a document language, then Generate timesheet PDF.
- Review the PDF before using the print or share icon.
The example groups Installation and Planning under Office refresh. The signature area is blank space for signing the document; the app does not capture a signature or send an approval request.
Filter an hours report
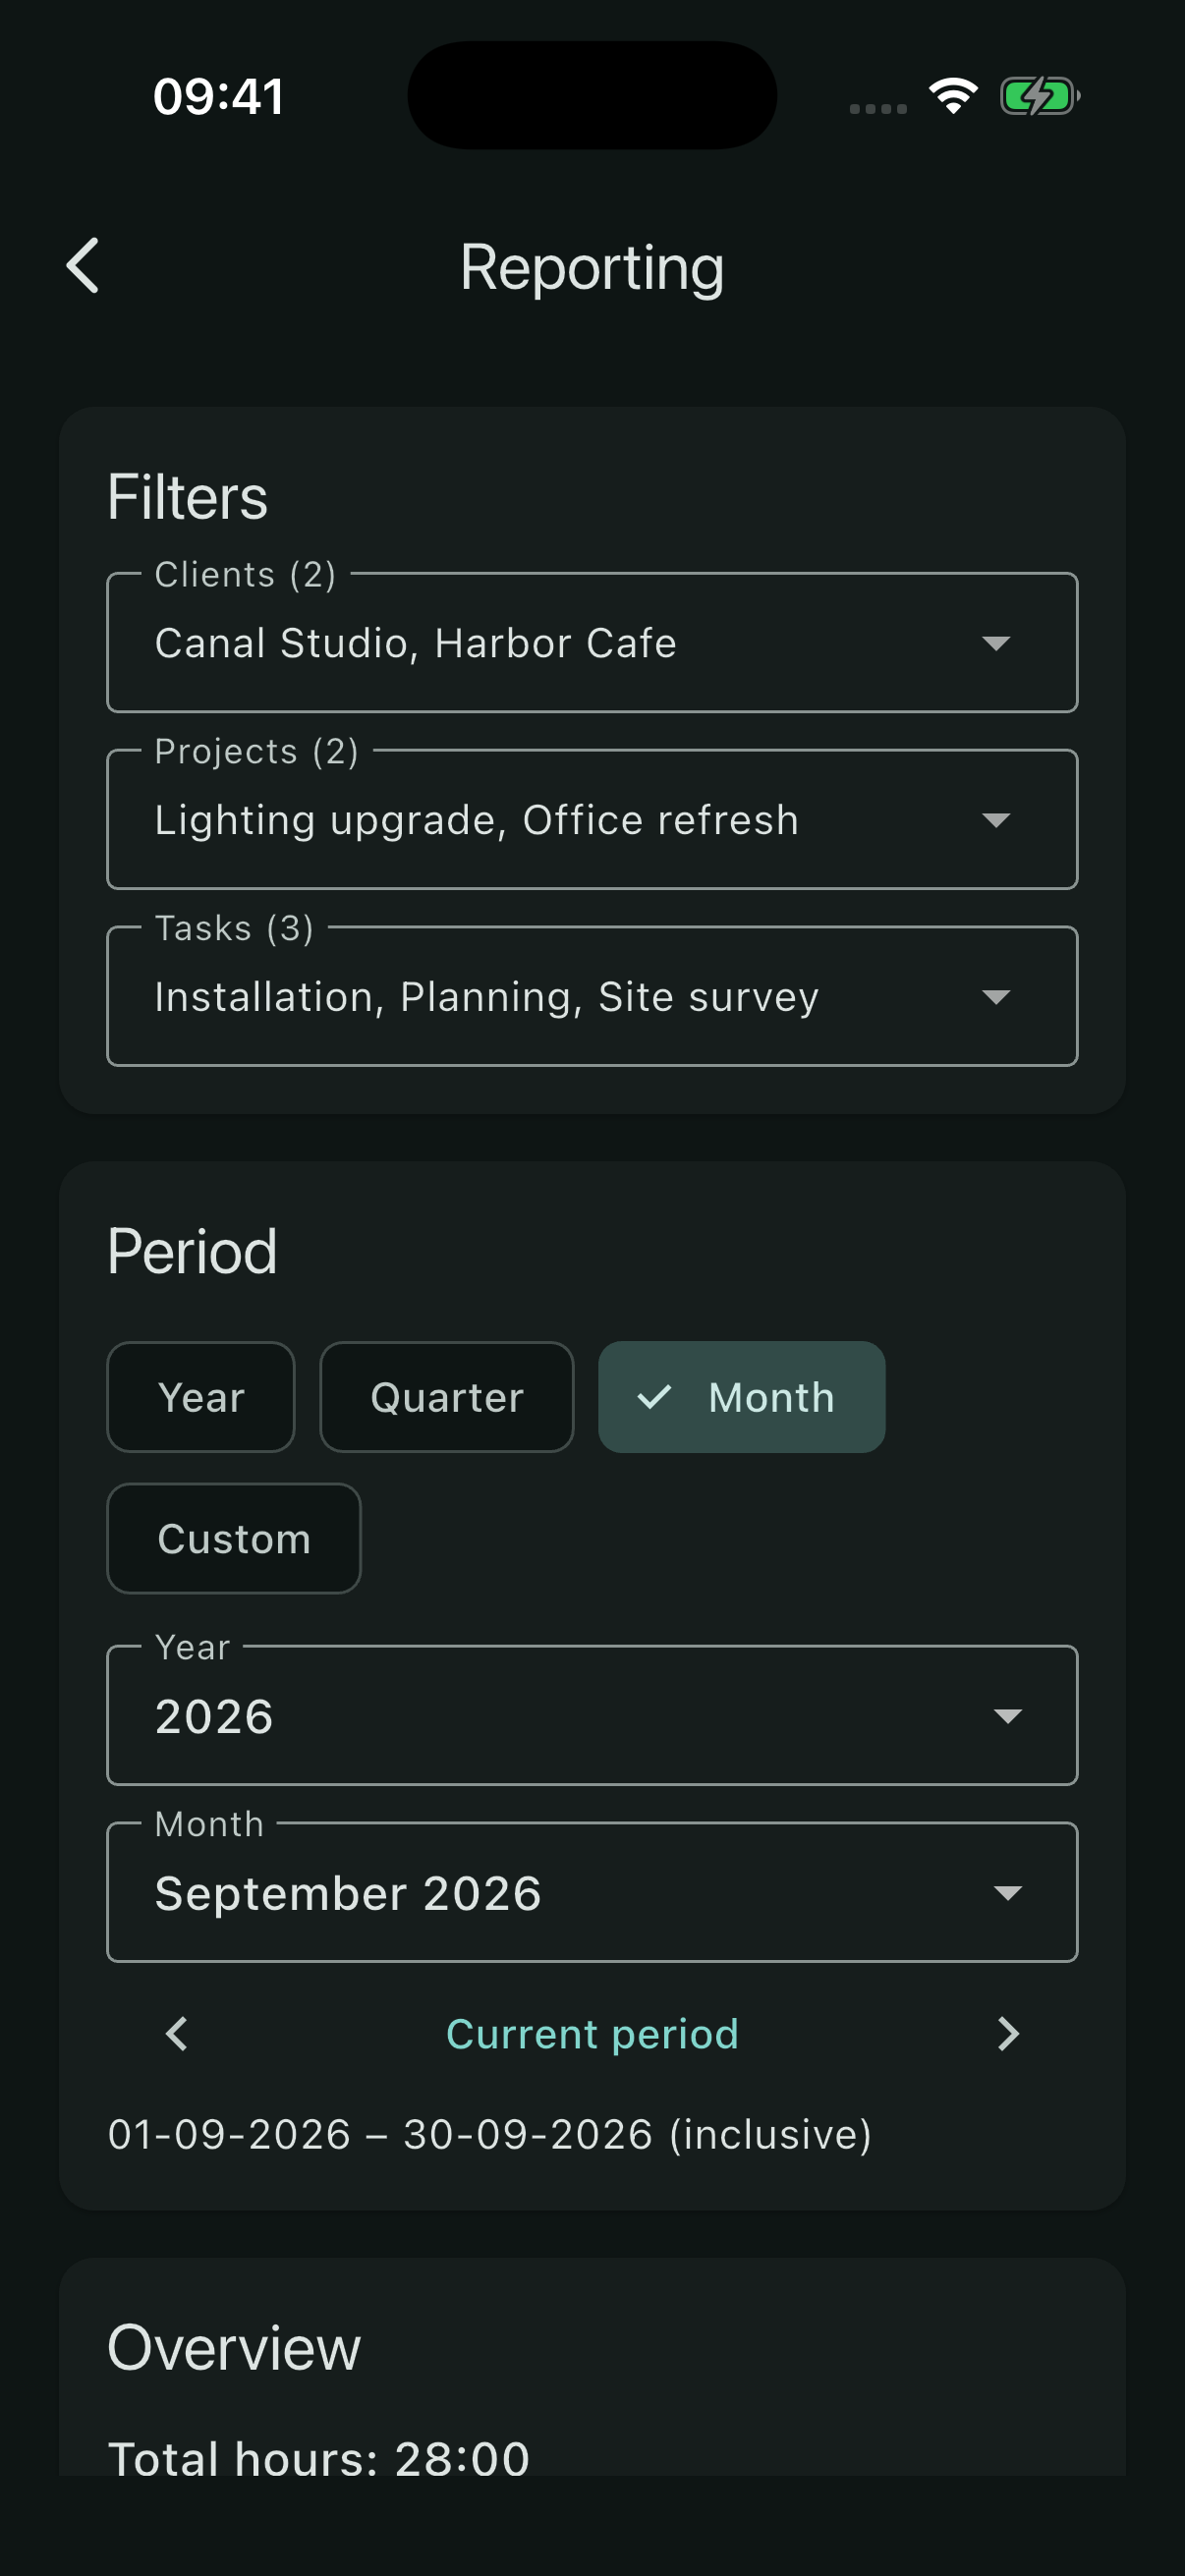
Open Reporting and select the clients, projects and tasks you want. Choose Year, Quarter, Month or Custom for the period.
The on-screen overview gives you the selected total before you export. A custom period includes both its start and end date.
- Overview: totals grouped by client, project and task.
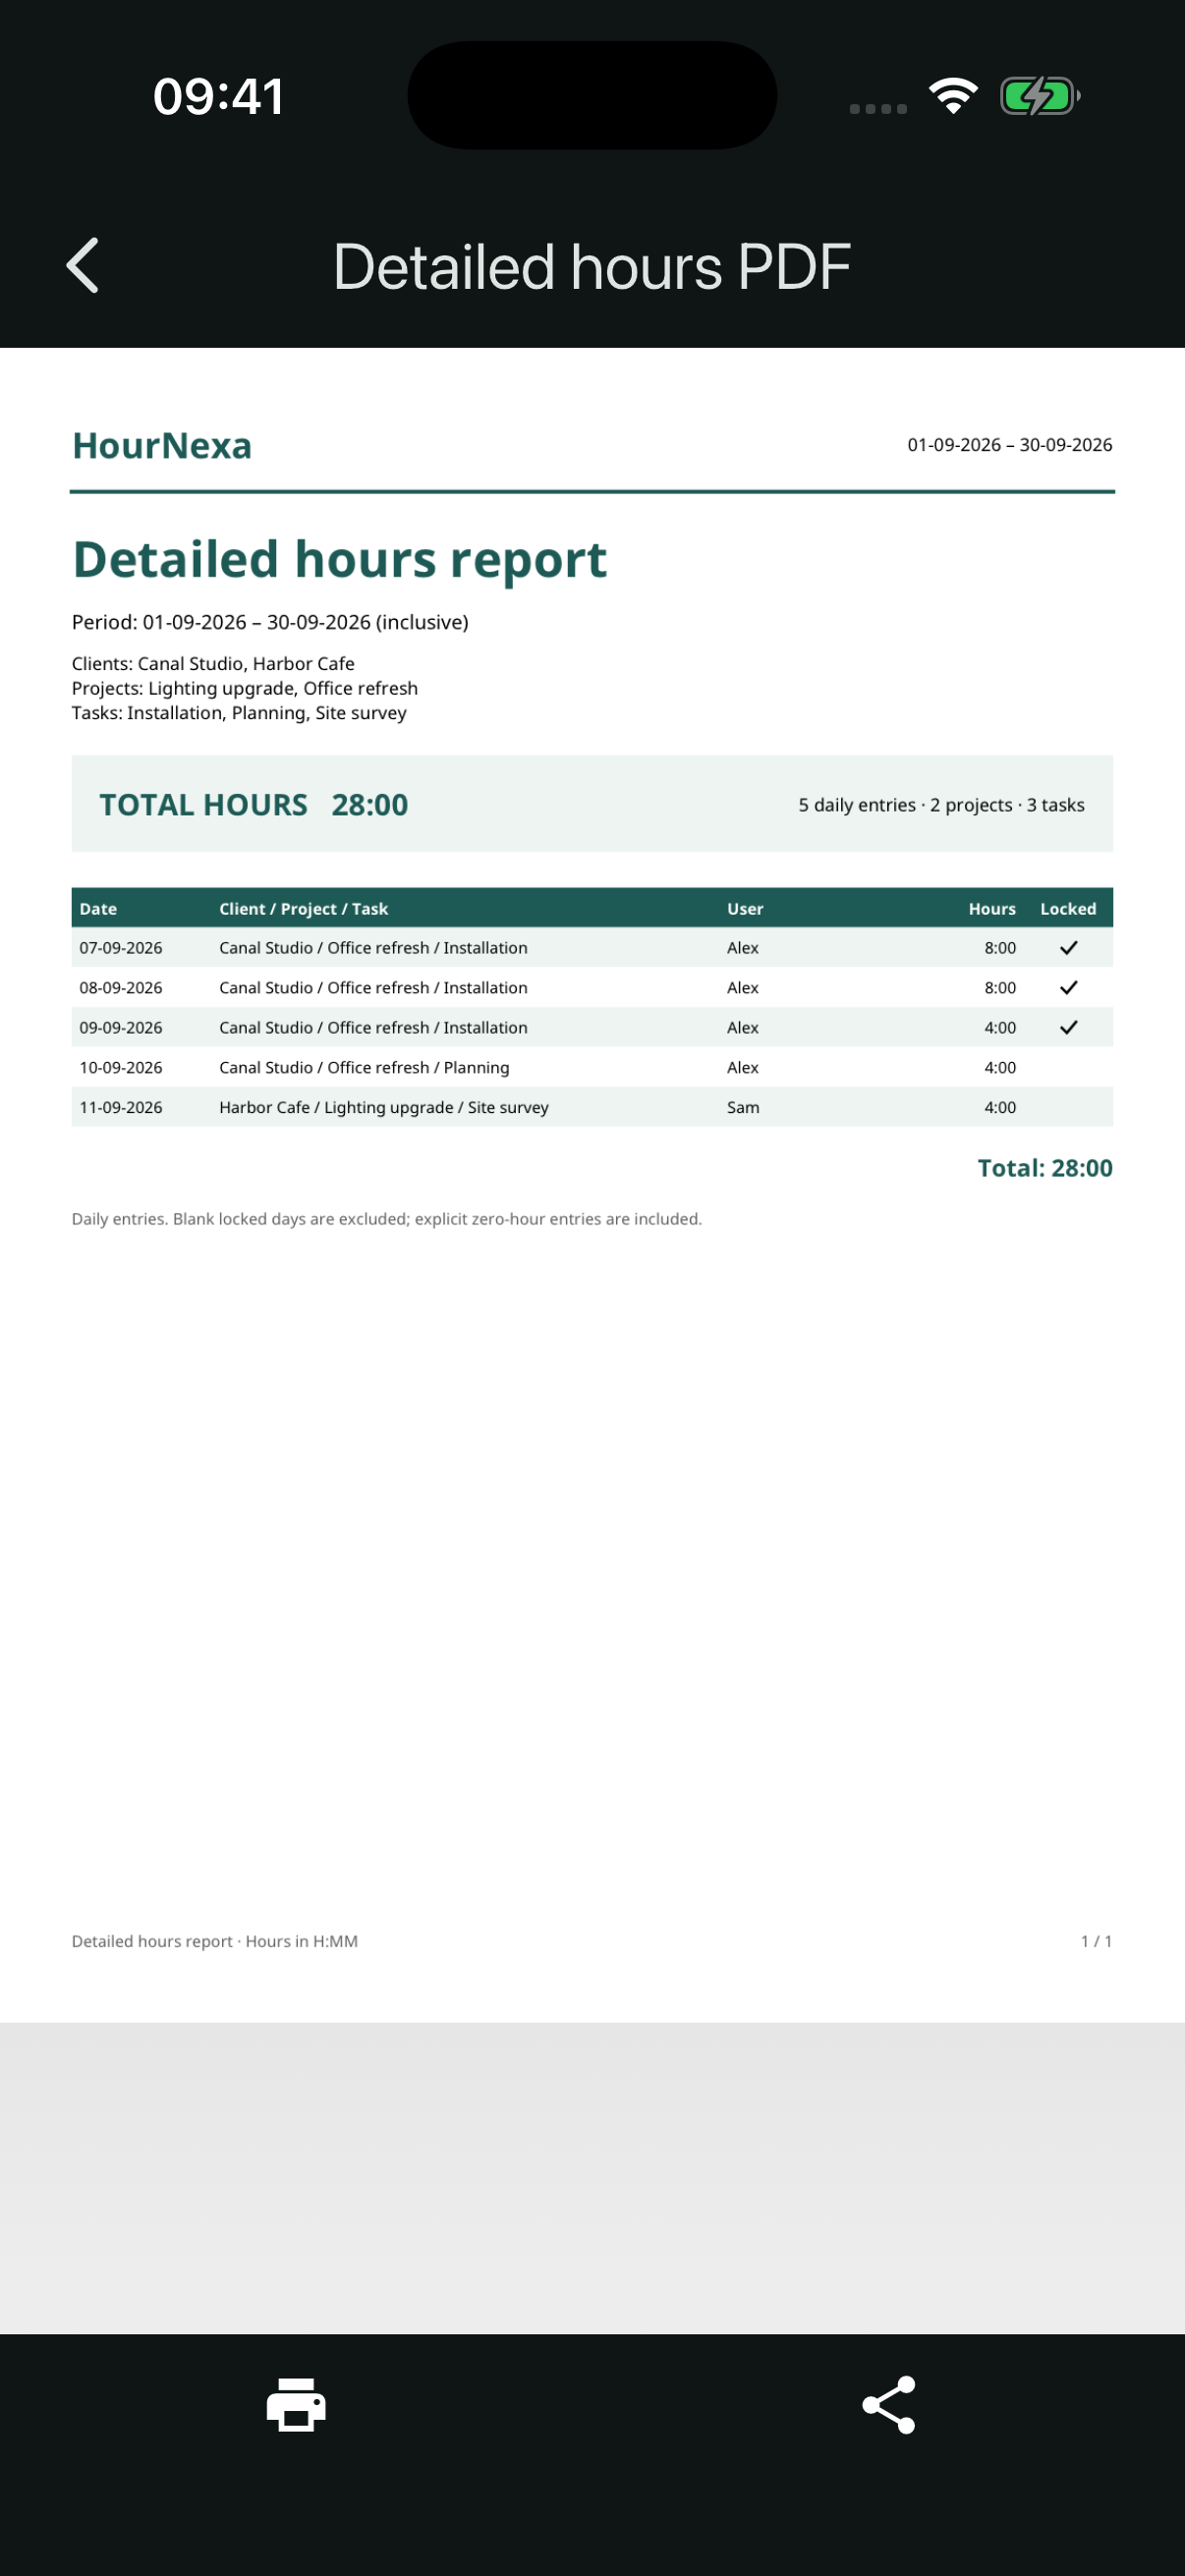
- Detailed hours: individual daily entries; the PDF shows whether each day is locked.
- CSV: useful for a spreadsheet. The detailed export includes automatic, confirmed and locked status.
A detailed report omits blank locked days. A deliberately recorded zero-hour entry is different from a blank day.
Check the result before sharing
Check the names, date range and totals in the preview. Use the share icon to choose where the document goes, or the print icon to open the device’s print options. Opening the preview does not email it to your client.
Prepare a mileage claim
- In Settings → Mileage claims, choose the mileage unit and enter your Mileage rate.
- Enter a driving distance on each relevant project or task. A task can inherit its project’s distance.
- Open Reports & timesheets → Mileage claim and choose the work and period to include.
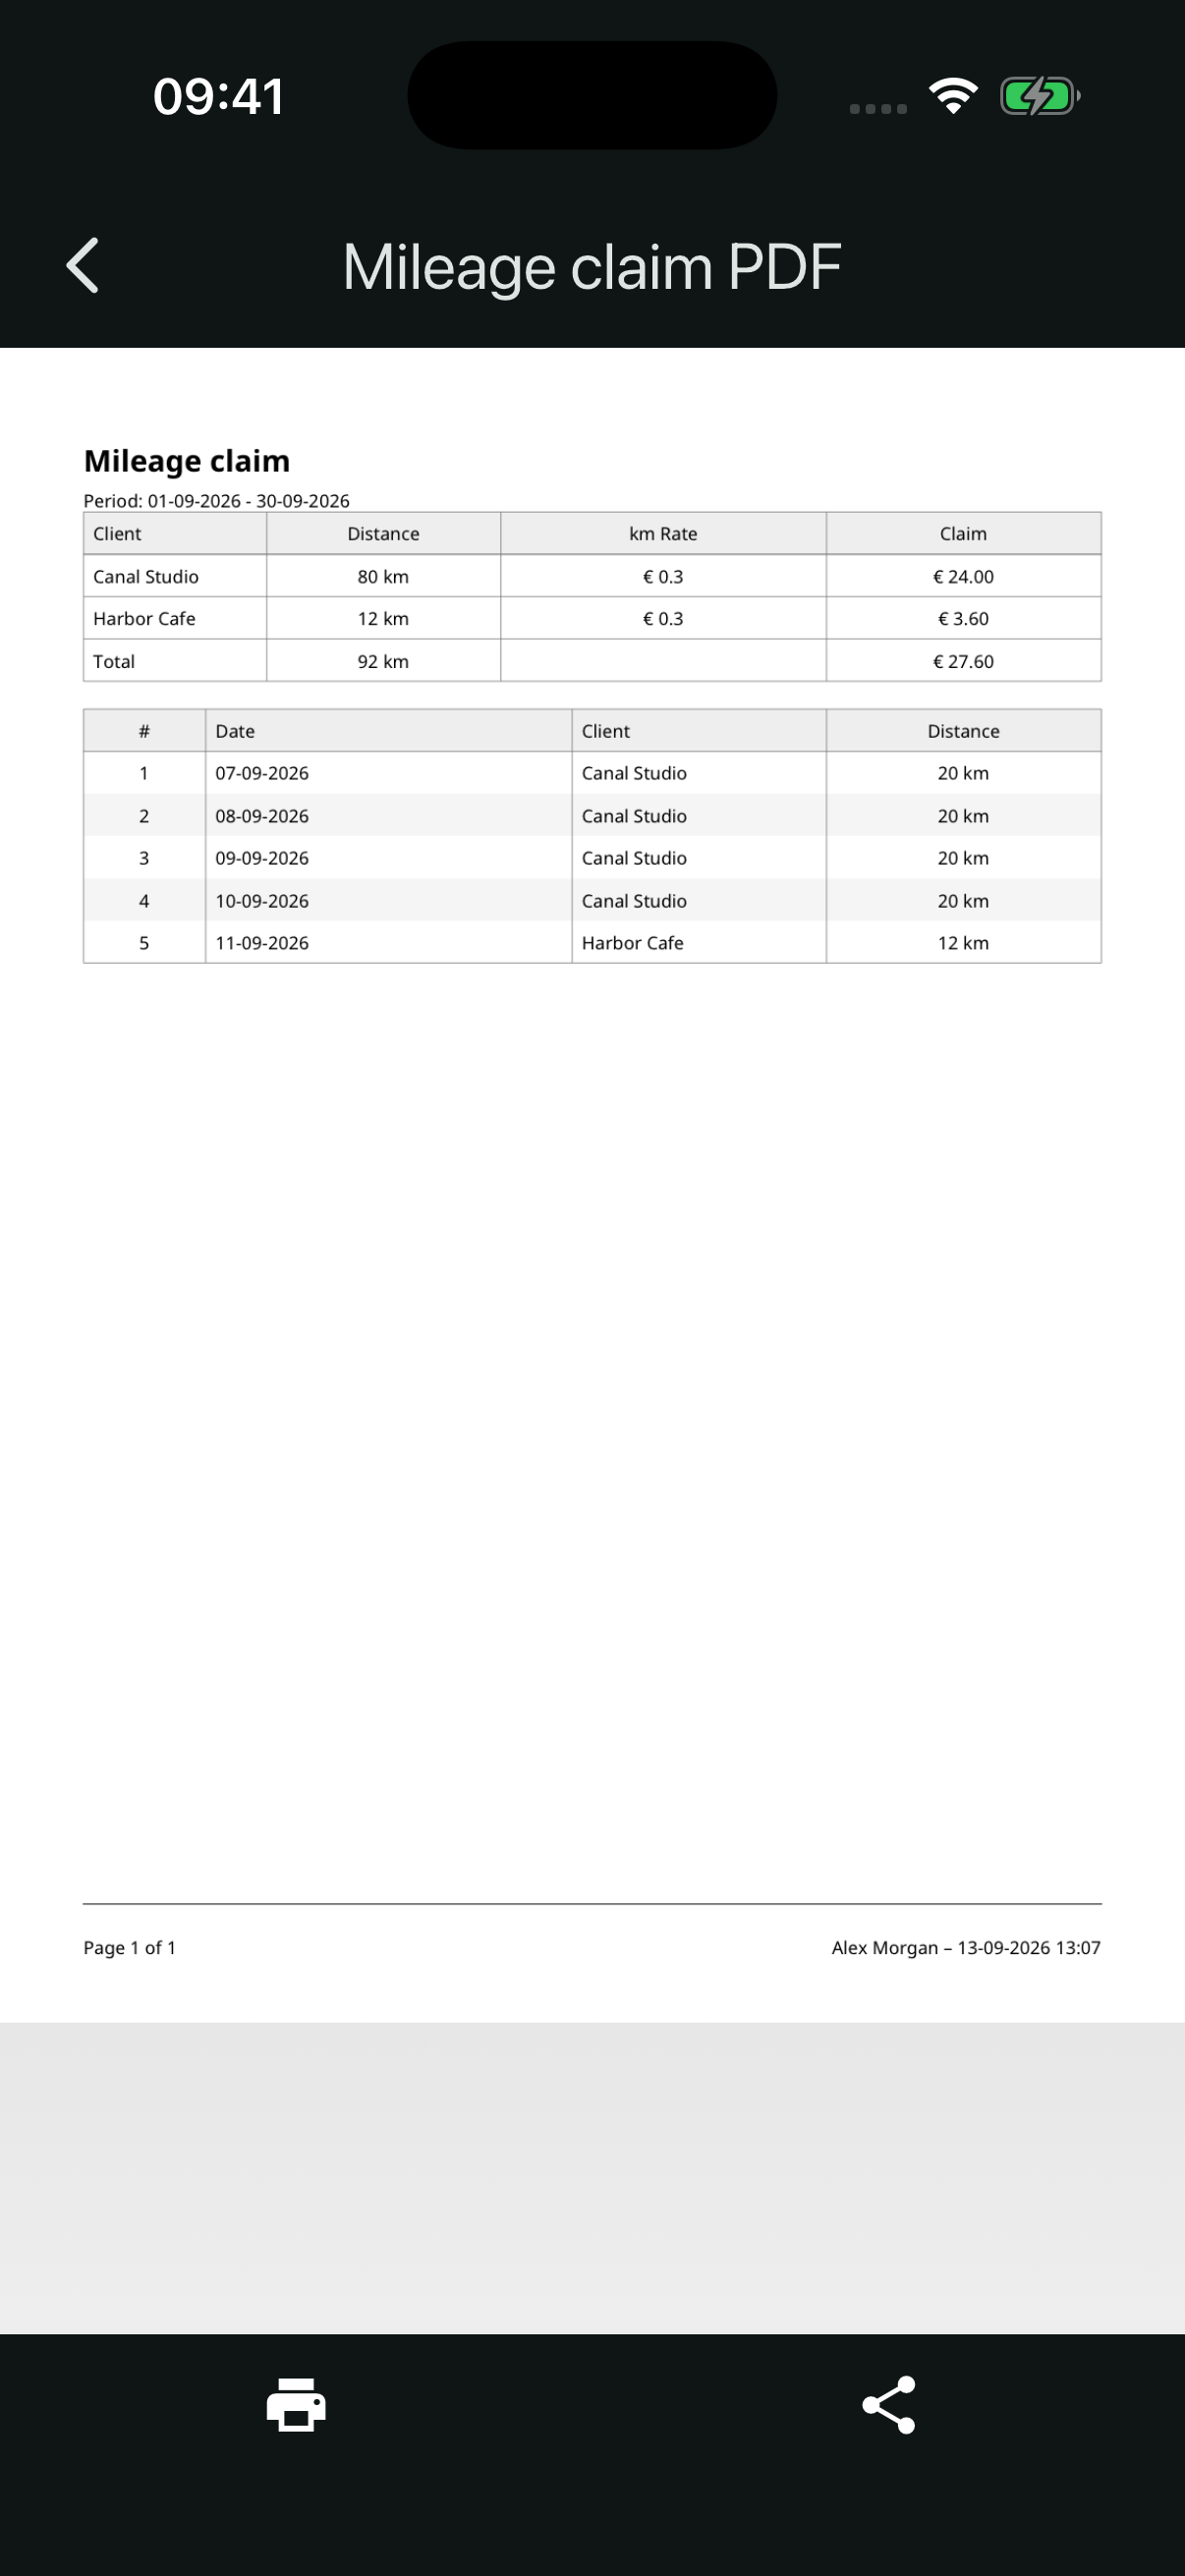
- Check the selected rows and total distance, then generate the PDF.
A driving distance is the total to claim for that task on one recorded day. Three days at 20 km give 60 km. At an example rate of 0.30 per km, that is 18.00. Choose your own agreed rate; the example is not a prescribed allowance.
Use your own report labels
Manage translations lets you manage the shared report labels. Original languages are read-only. Add a language or use Copy from to create a custom version, then edit and save its labels.
These labels control the documents, not the language of the whole app. Shared labels apply across reports. Select the intended language before generating the next PDF.